
Managing the update channels for Microsoft 365 Apps is crucial for IT administrators aiming to control the deployment of new features and updates within their organizations. Microsoft Configuration Manager (ConfigMgr) offers a robust platform to facilitate this process, ensuring devices receive updates in alignment with organizational policies. This guide provides a comprehensive walkthrough on changing the Microsoft 365 Apps update channel using ConfigMgr.
Prerequisites
Before proceeding, ensure the following conditions are met:
-
Configuration Manager Management: ConfigMgr should be configured to manage the "Click-to-Run" workload for Office applications.
-
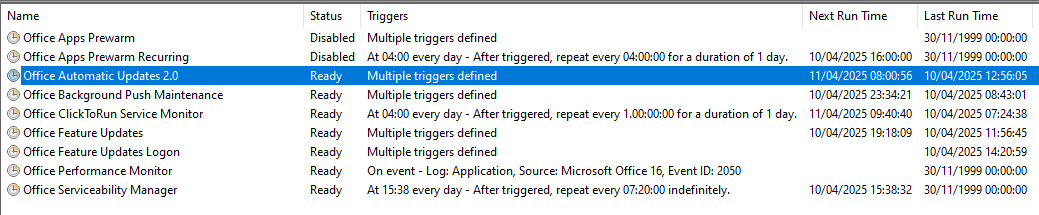
Scheduled Task Activation: The "Office Automatic Update 2.0" scheduled task must be enabled on all client devices to allow automatic detection and application of updates.
-
Update Deployment Configuration: ConfigMgr should be set up to deploy Microsoft 365 Apps updates. Detailed instructions are available in Microsoft's documentation on managing updates to Microsoft 365 Apps with Configuration Manager.
-
Administrative Access: Ensure you have the necessary permissions to create applications and device collections within ConfigMgr.
Step-by-Step Guide to Changing the Update Channel
Step 1: Remove Conflicting Group Policies
If there are existing Group Policies that define the Office update channel, they will override settings configured via the Office Deployment Tool (ODT). To prevent conflicts, remove any such Group Policies before proceeding.
Step 2: Deploy Updates for the Target Channel
Create dynamic collections in ConfigMgr to deploy Microsoft 365 Apps updates corresponding to the desired channel. For guidance on setting up these collections, refer to Microsoft's article on switching to Monthly Enterprise Channel with Configuration Manager.
Step 3: Prepare the Office Deployment Tool (ODT)
-
Download the Latest ODT: Obtain the newest version of the Office Deployment Tool from Download Office Deployment Tool from Official Microsoft Download Center
-
Extract ODT Files: After downloading, extract the contents of the ODT package. Retain only the
setup.exefile and remove other files to avoid confusion. -
Create Configuration XML: Craft a configuration XML file (e.g.,
Configure.xml) specifying the desired update channel. Save this XML in the same directory assetup.exe.-
For Monthly Enterprise Channel:
-
For Current Channel:
-
Step 4: Develop a Deployment Script
Create a PowerShell script to automate the channel change process. The script should execute the following actions:
-
Run ODT with the Configuration XML: This updates the
CDNBaseUrlregistry key to reflect the new channel.Remove Update Detection Timestamp: Delete theUpdateDetectionLastRunTimeregistry key to prompt immediate detection of the new policy. -
Trigger Scheduled Tasks and ConfigMgr Actions: Initiate the "Office Automatic Updates 2.0" scheduled task and trigger ConfigMgr actions like Hardware Inventory and Software Update Deployment Evaluation.
Sample PowerShell Script:
Remove-ItemProperty -Path HKLM:\software\Microsoft\Office\ClickToRun\Updates -Name UpdateDetectionLastRunTime -Force Get-ScheduledTask -TaskName "Office Automatic Updates*" | Start-ScheduledTask # Run Hardware Inventory Invoke-WMIMethod -ComputerName $env:COMPUTERNAME -Namespace root\ccm -Class SMS_CLIENT -Name TriggerSchedule “{00000000-0000-0000-0000-000000000001}” # Software Update Deployment Cycle Invoke-WMIMethod -ComputerName $env:COMPUTERNAME -Namespace root\ccm -Class SMS_CLIENT -Name TriggerSchedule “{00000000-0000-0000-0000-000000000108}” # Software Update Deployment Evaluation Cycle Invoke-WMIMethod -ComputerName $env:COMPUTERNAME -Namespace root\ccm -Class SMS_CLIENT -Name TriggerSchedule “{00000000-0000-0000-0000-000000000114}”
Step 5: Create and Deploy the Application in ConfigMgr
-
Application Creation: In ConfigMgr, create a new application that utilizes the prepared PowerShell script for installation.
-
Deployment: Deploy this application to the device collection targeted for the channel change.
Step 6: Verification
After deployment, verify the update channel change by:
-
Registry Inspection: Check the
UpdateChannelandUpdateChannelChangedvalues in theHKLM:\SOFTWARE\Microsoft\Office\ClickToRun\Configurationregistry path. -
Office Application: Open any Office application, navigate to the Account menu, and confirm the displayed update channel.
Note: If the Office version remains the same across channels during the transition, the channel description in the Office application may not immediately reflect the change.
By meticulously following these steps, IT administrators can effectively manage and change the Microsoft 365 Apps update channels using Microsoft Configuration Manager, ensuring that devices within the organization receive updates in accordance with specified policies.


No comments:
Post a Comment